* ABOUT DOLLS AND DOLLHOUSES AND OTHER THINGS IN LIFE * ____________________________________________________________________________________________________ *** Feel free to visit my dollpage Min Hemsida/My Homepage ****
http://lilsdolls.se/ * About dolls and dollhouses ____________________________________________________________________________________________________ "All Photos Belongs to Lilsdolls and can not be used for commercial purposes or be published by others without permission." ____________________________________________________________________________________________________
" OBS! " "HALLUX VALGUS" NY BLOGG. Se länken nedan
http://lilsdollshalluxvalgus.blogspot.se/
________________________________________________________________

"WELCOME TO LEAVE A "COMMENT/PUSH THE

Visar inlägg med etikett dockskåp. Visa alla inlägg

måndag 27 maj 2013

MADE A NEW NURSERY OF A BASKET, FOR A DOLLHOUSE BABY

This room box will be a small nursery.

I found a basket in a shop that looked 
like a room. Could not resist buying it. 

Now I shall furnish it with some white 
furniture I have had for years and make 
many accessories for the room. It will 
be fun.

I printed out the wallpapers on my photo 
printer and used the extra fine specialty 
papers for good pictures, with a good end 
result.

Here I show the childrens unfurnished room. 

I will have to take away some paint stains that 
have ended up on the box.

"A warm welcome to my new followers. "


Now I will make a lot of things for this
Nursery Roombox.

My New Nursery.

Added some material to the floor
because it was a bit uneven.

Basket/Nursery from Åhlens.

Basket/Nursery from Åhlens.

måndag 11 februari 2013

MINIATURES FOR MY NEW DOLLHOUSE BATHROOM AND "A LITTLE PEEK" OF IT

STILL working on my new bathroom. I have made
two carpets and a houseplant that I think will fit
in well. I made some flowers and a I found a little
bench among my things, I will use them till I
found out how I want the finish to look. I also
have to check the lights I have. Hope I have
someone who fits in well

I have to make some more small things, like
toiletpaper holder, holders for the towels, some
soap and dental cream and so on.....

This is a very fun project, since I wanted to do
something "that did not look anything like" the
bathrooms in my other houses. The mirror wall
was a fun idea I think!

Houseplant that I have made and an extra flower
loop to decorate with

Two carpets that I have made. I sewed gold thread
around the edges.

Just a little peek. It is not ready yet.  I am just
testing things here. The wall color is not as strong
as it looks in the photo. I think it depends on the
camera flash, but  I am thinking that I maybe
will change the color to light blue. The mosaic walls
are movable so it is easy to change if I decide that.
---------------------------------------------------------

WHEN I was looking for things I found my battery
power box.


I have been surching for it for a long time. Tested
if it works and took photos of it.
I am going to use it in "another singel installation",
with some of my old vintage lamps.  Now I do not
think it looks so ugly anymore ha ha ... but it will
not appear in the installation, it will be hidden.

NOTE! TO "PINTEREST AND OTHER FORUMS"
IF YOU "PIN MY PHOTOS", LEAVE A COMMENT SO
I KNOW THAT YOU HAVE DONE THAT AND TELL ME
WHERE THEY "WILL BE SHOWN". *** Thank you..

lördag 2 februari 2013

ADDED BASEBOARDS AND PAINTED THE TOILET SEAT FOR MY DOLLHOUSE

I have painted the toilet seat, so now it is white,
beacue I did not want it to be brown. I painted it
with oil based paint.

My "Helping Hands" holder is really a help these
kinds of times, when I want to paint small things. 
You can twist the arms up and down and spin
around them as you want. It often makes it easy
to paint all sides at once, while it secures
what you should paint. It is also heavy so it can not
fall.

 My Helpings Hands Tool is holding the toilet seat.


Now when the house was empty I made "simple"
baseboards throughout the house, because I have
not done it before.

NOTE! TO "PINTEREST AND OTHER FORUMS"
IF YOU "PIN MY PHOTOS", LEAVE A COMMENT SO I KNOW
THAT YOU HAVE DONE THAT AND TELL ME WHERE THEY
"WILL BE SHOWN". *** Thank you.

tisdag 29 januari 2013

DONE WITH THE MIRROR WALLS FOR MY DOLLHOUSE BATHROOM AND CHANGED A WALL


Now I have done the work with the mirrors for the
walls in my dollhouse. They can stand by themselves.
I will ony attach them with some double sided tape.
Made a couple of tile walls also. They are white so I
decorated them a little.

I thought the bathroom was too small so I took
down a wall and moved it a bit, to get more space. .
I also had to repaint the back wall and redo two of
the floors. That was Hard work I can tell.

Since I took down the wall, I can now show you
how I hang doors in my doll houses. I only use two
steel pins to each door. "The door-frame was 
already there in this house".

*The upper hole in the wall above the door, must 
be the same length as the steel pin, so it can fall 
down into the hole in the door that is half size. 
Fasten the upper steel pin with a piece of tape, 
then insert the door. Then pull off the tape and the 
pin falls into the hole in the door *

*This description above applies if there is already 
an existing door frame attached, or if there is no 
frame at all that will  be used.= This makes it 
possible to change the door to another one if you 
want*

* If you build an entire new door frame to be inserted
 in the wallinsert the pins before you glue the door 
frame parts together. All holes must/can then be half 
as deep/long as steel pins length. *

There was little marks on the floor and the wall
surface after I took down the wall, and when that
happens, I use this kind of scrape. Useful for removing
old dried glue and other things. I have a special just
for hobby (and a similar one for my glass stove).

So now I can furnish and decorate the bathroom.
It will be fun.


NOTE! TO "PINTEREST AND OTHER FORUMS"
IF YOU "PIN MY PHOTOS", LEAVE A COMMENT SO I
KNOW THAT YOU HAVE DONE THAT AND TELL ME
WHERE THEY "WILL BE SHOWN". *** Thank you

söndag 20 januari 2013

MIRROR WALLS FOR MY DOLLHOUSE BATHROOM

Now I've finally got hold of very small mirror 
glass mosaic for the bathroom walls, in one of my
dollhouses that I want to change the look of. 
It is small mirrors and each piece are 2x2 cm. 
I will make loose walls that are removable
and attach them only with adhesive tape on 
the back of them. It will be fun to do this.

NOTE! TO "PINTEREST AND OTHER FORUMS
IF YOU "PIN MY PHOTOS", LEAVE A COMMENT SO I KNOW
THAT YOU HAVE DONE THAT AND TELL ME WHERE THEY
"WILL BE SHOWN". *** Thank you....

lördag 15 december 2012

COAT RACK FOR THE HALL, LAUNDRY DRYING RACK FOR THE BATHROOM AND SOME SMALL THINGS


This is a simple copy of a coat rack I saw in the ´
hall in my dentists waiting room.

¨
The hall


This drying rack is a copy of the one I had in my
bathroom before I moved. Very funny to make.
Note the "Santa" on the wall that is made
​​of fabric straps.

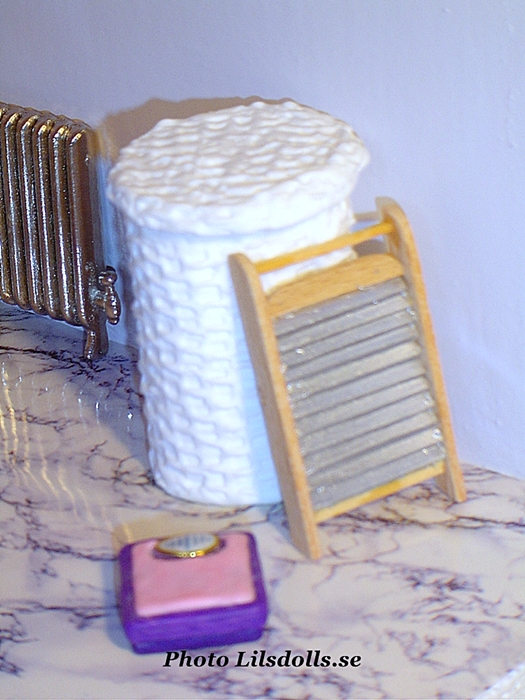
Homemade things except for the Bahtub.

Homemade things made of Fimo and wood

Homemade small things made of fabric and Fimo

onsdag 12 december 2012

MANAGE ELETRICITY CABLES IN YOUR DOLLHOUSE THAT HAS SIMPLE ELECTRICITY

An easy way to manage electricity cables
in dollhouses that has simple electricity

If you have a dollhouse with the simplest
electricity, this is an easy way to shorten
and attach cables in the dollhouse
without cutting them, and if needed one
can use some adhesive tack, if the cables
are just hanging down a little.

"Note: You should always be careful with
handling electricity in all its forms."

This is how it looks like in the house..
Sometimes one can find lamps like this old
"Brio Mobilia Original" lamp, that has
cables/cords made in the way shown above,
but not very often.

It is cold outside... Brrrrrrr

söndag 25 november 2012

MINIATURE DOLL HOUSE, FOR THE DOLL HOUSE DOLLS, DOLL HOUSE MINIATURES, DOCKSKÅPSMINIATYRER

"A friend asked questions about my mini-mini 
doll house, so I publish this dolls-dollhouse once more
in a special post and add another photo."

Made this little red mini-miniature Doll House, for
one of my Doll-house dolls in my "Rose House" =
pink house. As you can see, I have made this house
in a childish way.

I made this little house of wood and I painted the
outside and then I hanged small wallpaper inside. I
made all the small furniture of wood and fimo and
they are glued into the house. The size is 3,5x2,5x6
cm. It is rather easy to build it.

Mini-mini-dollhouse


The doll is playing with the house

tisdag 13 november 2012

DOLLHOUSE-BATHROOM, DOCKSKÅPS-BADRUM. SCALE 1:12

Feel free to visit my dollpage Min Hemsida/My Homepage
http://lilsdolls.se/ About dolls and dollshouses

I bought me a new bathroom that is in scale 1:12.
I've been looking  for this type of tub for some time,
because I'm pretty tired of the old type. Now I will
make a change of one of my dollhouse bathrooms
entirely, but I will only use the bathtub, sink and
mirror. I think the toilet looks too old fashioned. I
will save it for another time. Now I have to give
some thought to how I want the bathroom to look
like.


måndag 5 november 2012

LED-LAMPS FOR THE PARTY OR THE DOLLHOUSE

Feel free to visit my dollpage Min Hemsida/My Homepage
 http://lilsdolls.se/  About dolls and dollshouses

"Maybe we who loves dollhouses can make an
dollhouse"lamp of these.

Just thought I'd tell about, now that Lucia and
Christmas is coming, that there are these little
LED-lights to buy here and there.
Perfect to have on various light decorations.
They go on small batteries. The flame is actually
slightly moving  on mine, so they almost look like
the real candles and are the same size.
Available both with and without the gray holder  
have seen. Fits like party lights year round ......
Was thrilled when I discovered them.

torsdag 11 oktober 2012

BRIO DOLLHOUSE, LUNDBY DOLLHOUSE, PLASTIC FRONT COVERS TO KEEP AWAY THE DUST.

Feel free to visit my dollpage Min Hemsida/My Homepage
http://lilsdolls.se/ About dolls and dollshouses

"Keep away the dust from your dollhouses that has no front doors."

Since I do not want a lot of dust in my dollhouses, I have
made simple plastic covers for the cabinets fronts. The
picture shows how I have attached them on my Brio Houses. 
I have these type of covers on my Lundby houses to.
I have used postal clips and velcro to my plastic covers.  
Easy to remove and put them back again when you want.
I made a model/pattern of paper first.
There are other ways to attach them, without damaging the
edges of the houses.

More to see and read about BRIO, Europa, Lundby
Dollhouses-Furniture and Jacobsen furniture on
my Homepage at: http://www.lilsdolls.se/

fredag 7 september 2012

LUNDBY BATHROOM 2012, MY NEW DOLLHOUSE BATHROOM

Feel free to visit my dollpage Min Hemsida/My Homepage
http://lilsdolls.se/ About dolls and dollshouses

I could not resist the new bathroom from Lundby so 
I boughtit. I think it's really neat especially the bathtub, 
so now I willreplace my old "Barton" bathroom in one 
of my dollhousesto this. Lundby and Brio dollhouses
are made in scale 1:18 so the furniture are rather small.


Lundby shower and bathtub year 2011-2012


Lundby washbasin and toilet year 2011-2012
 
Lundby shower and bathtub. Scale 1:18
 
Lundby washbasin and toilet. Scale 1:18

Do not know where to put the Barton bathroom now.
I think this one is rather cool too
 
A. Barton Bathroom from the 1950´s - 1960´s. Scale 1:18